Welcome to a brand-new feature on our website: a quilting-focused blog by me, Sarah at Sundew Quilts, in collaboration with Sew With Vision! We’ll cover a wide range of topics from classic block patterns to new notions, common roadblocks, tips and tutorials.
April showers bring April flowers
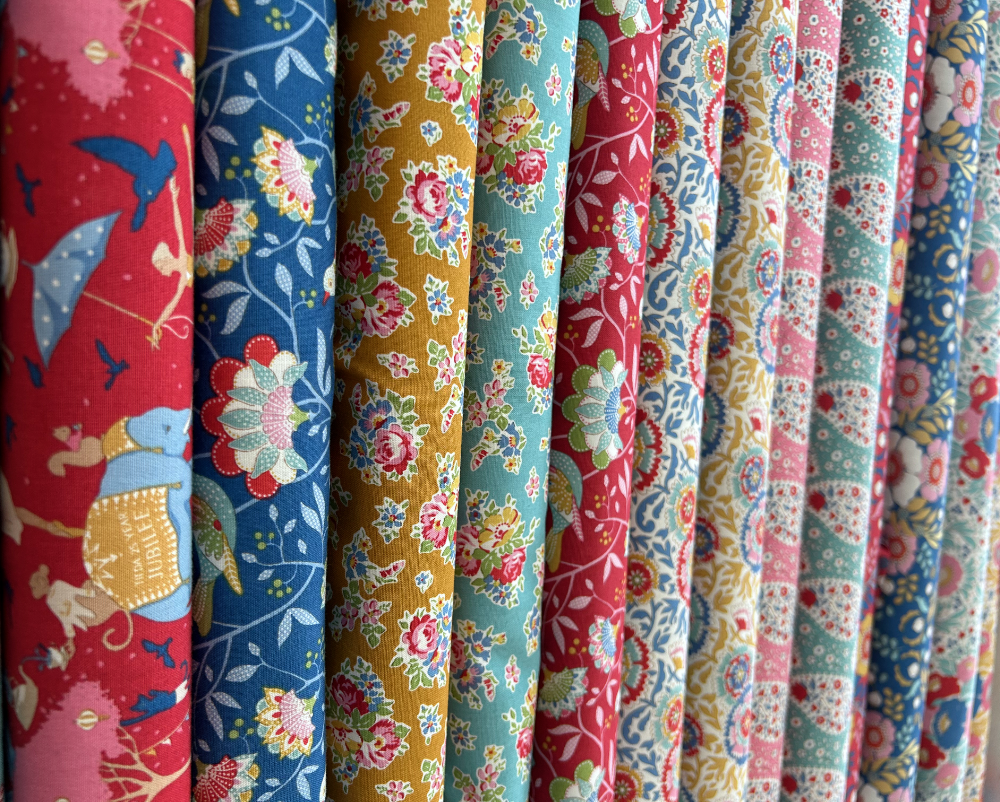
This month we’re diving into a pretty Spring craft: a quilted table runner using the new Jubilee collection from Tilda! I just love this simple flower block, which I’ve seen under the name Daisy, Blossom or Violet. Four of them make up a 14”x53” table runner that will look perfect under a bouquet of red or yellow tulips this Spring.

Fabric Requirements
- (4) Fat quarters
- Fabric 1: Aqua
- Fabric 2: Gold
- Fabric 3: Red
- Fabric 4: Blue
- (1) 18” x 58” piece of batting
- (1) 20” x 60” piece of backing fabric, or two pieces 20”x30” (1 yard/1 metre).
- Optional: 10” x width of fabric for binding (or use fat quarter scraps for a scrappy binding)

Cutting instructions
From each fat quarter cut:
- (4) 6.5” squares
- (4) 3” squares
- Optional: (2) 2.5” x 21” strips for scrappy binding
You will have a total of (16) 6.5” squares and (16) 3” squares from the four fat quarters. If using a scrappy binding, you will also have (8) 2.5” x 21” strips.
From background fabric cut:
For flowers:
- (32) 3” squares
For sashing:
- (3) 1.5” x 12.5” strips
- (2) 1.5” x 42” strips
- (2) 1.5” x 11” strips
- (2) 1.5” x 14.5” strips

Creating the flower petals
Each petal will be created using three stitch and flip, or snowball, corners.
- Draw a diagonal line across each 3” square of backing fabric and across the 3” squares from Fabrics 1 and 2 (Aqua and Gold).

- Take one Aqua 6.5” square (Fabric 1). This will be a flower petal.
- Align one 3” background square with the top left corner, right sides together.
- Stitch across the diagonal, right on your drawn line.
- Repeat on the top right corner, using another background square.
- Align one 3” square of Gold fabric (Fabric 2) on the bottom right corner. This will be the centre of the flower. Sew across the diagonal, right on the drawn line.

- Trim each of the three corners ¼” away from the seam (toward the outer corner).

- Press the three seams while closed to set them, then flip the open and press seams open.
- If needed, trim each petal to 6.5” square.
- Repeat for the remaining Aqua (Fabric 1) 6.5” squares.
- Repeat for the four Gold (Fabric 2) 6.5” squares, using an Aqua (Fabric 1) 3” square on the bottom right corner (for the centre of the flower).
Directional fabrics
The red and blue fabrics (Fabrics 3 and 4) are directional. Take a moment to lay out the red flower (Fabric 3) to get the fabric direction pleasing to you. Refer to the photo for petal placement (rotate each petal ¼ turn).
I chose to align the top two petals with birds facing up and bottom two with birds facing down and placed background squares accordingly. You may choose to have the birds rotate 90 degrees for each petal, or have them all facing one direction.

For the centre of the flower, place the 3” square of blue fabric (Fabric 4) in the appropriate place on each 6.5” red square (Fabric 3) - see photo below.
Fold the blue square with right side up toward the corner (as if it were sewn) to audition how the prints would look.
Once the birds are facing the right direction, lightly finger-press the 3” blue square to indicate its orientation and then draw the diagonal line along this fold on the wrong side of the fabric. Pin to keep the correct orientation.

- Sew the three snowball corners (two background 3” squares and one blue 3” square) to the red petal per your layout.
- Trim each of the three corners ¼” away from the seam (toward the outer corner).
- Press the three seams while closed to set them, then flip the corners open and press seams open.
- If needed, trim the petal to 6.5” square.
- Repeat for the remaining red petals.
- Repeat for the blue fabric (Fabric 4) using two background 3” squares and one red 3” square (Fabric 3) per petal. Pay attention to layout and fabric direction as you did for the red fabric.
Assembling the flower
Arrange the four petals for each flower in two rows and two columns. Refer to the photo below for petal placement (rotate each petal ¼ turn with the colorful corners to the center).
Sew together each row and column. Press seams open. You may wish to pin the intersections at the center of the flower to ensure those points line up.
Square each flower up to 12.5” x 12.5”.

- Take the (3) 1.5” x 12.5” strips. Sew one strip to the right of each of the Red (Fabric 3), Aqua (Fabric 1) and Blue (Fabric 4) flowers. Press.
- Sew the flowers together in a row as follows: Fabric 3 (red), Fabric 1 (aqua), Fabric 4 (blue), Fabric 2 (gold). Press.

- Sew (1) 1.5” x 11” strip to the end of a 1.5” x 42” strip. Repeat to make (2) 1.5” x 52.5” strips. These are a bit longer than the length of your row of flowers to help with squaring up.
- Sew these strips to the top and bottom of your row of flowers. Press and trim flush with the left and right sides of the row.
- Finally, attach (1) 1.5” x 14.5” strip to the left side and (1) 1.5” x 14.5” strip to the right side of your row of flowers.
Congratulations! You have a beautiful Spring table runner top.

Sandwich and quilt your project
Sandwich your backing, batting, and top together and baste to your preference (I use 505 spray baste for everything).
Click here for a great video tutorial for sandwiching and basting. Make sure to center the top on the batting and backing so it doesn’t overhang.
Quilt to your preference. As you can see below, Sally quilted this runner beautifully! A small project like this is a great time to practice your free motion quilting or curvy walking foot designs. Click here for a video tutorial by Just Get it Done Quilts for some easy quilting patterns.

Make and attach binding
To finish this runner, you will need about 146” of continuous binding (including extra to overlap at the ends). If not using scrappy binding, this will be (4) 2.5” x width of fabric strips.
If you are using scrappy binding: take the eight 2.5” x 21” strips and sew them together in pleasing color order.
You can sew the strips together, aligning the edges straight together, right sides together, pressing the seams open. This will make the transitions between colors straighter, but adds bulk in the binding.
Or you may wish to sew the scraps together with a diagonal seam. To do this, align two strips right sides together, perpendicular to each other. Draw a line diagonally from top to bottom edge (as if doing a stitch and flip corner). Sew along the line and trim ¼” away from the line, cutting off the outer triangle.
Continue until all 16 strips are sewn in a continuous length. Press these seams open.
Fold and press your binding strips in half, wrong sides together, along the length of the binding (so you have a long 1.25” wide strip of material with right sides out).

Bind your runner as preferred. Sally prefers attaching binding to the front first and hand finishing on the back. I prefer attaching the binding to the back first and top stitching to the front.
- Click here for a machine binding tutorial from Merry Mabel Market.
- Click here for a tutorial on hand sewing the back from Pin Cut Sew.
Thanks for joining us on this new venture! If you have questions, please contact us and remember to check back monthly with sewwithvision.ca for blog posts!
We love to see your beautiful work! If you end up making a runner, don't forget to show it off in store, on our facebook page, or tag us @sewwithvision on Instagram.

Leave a comment
This site is protected by hCaptcha and the hCaptcha Privacy Policy and Terms of Service apply.