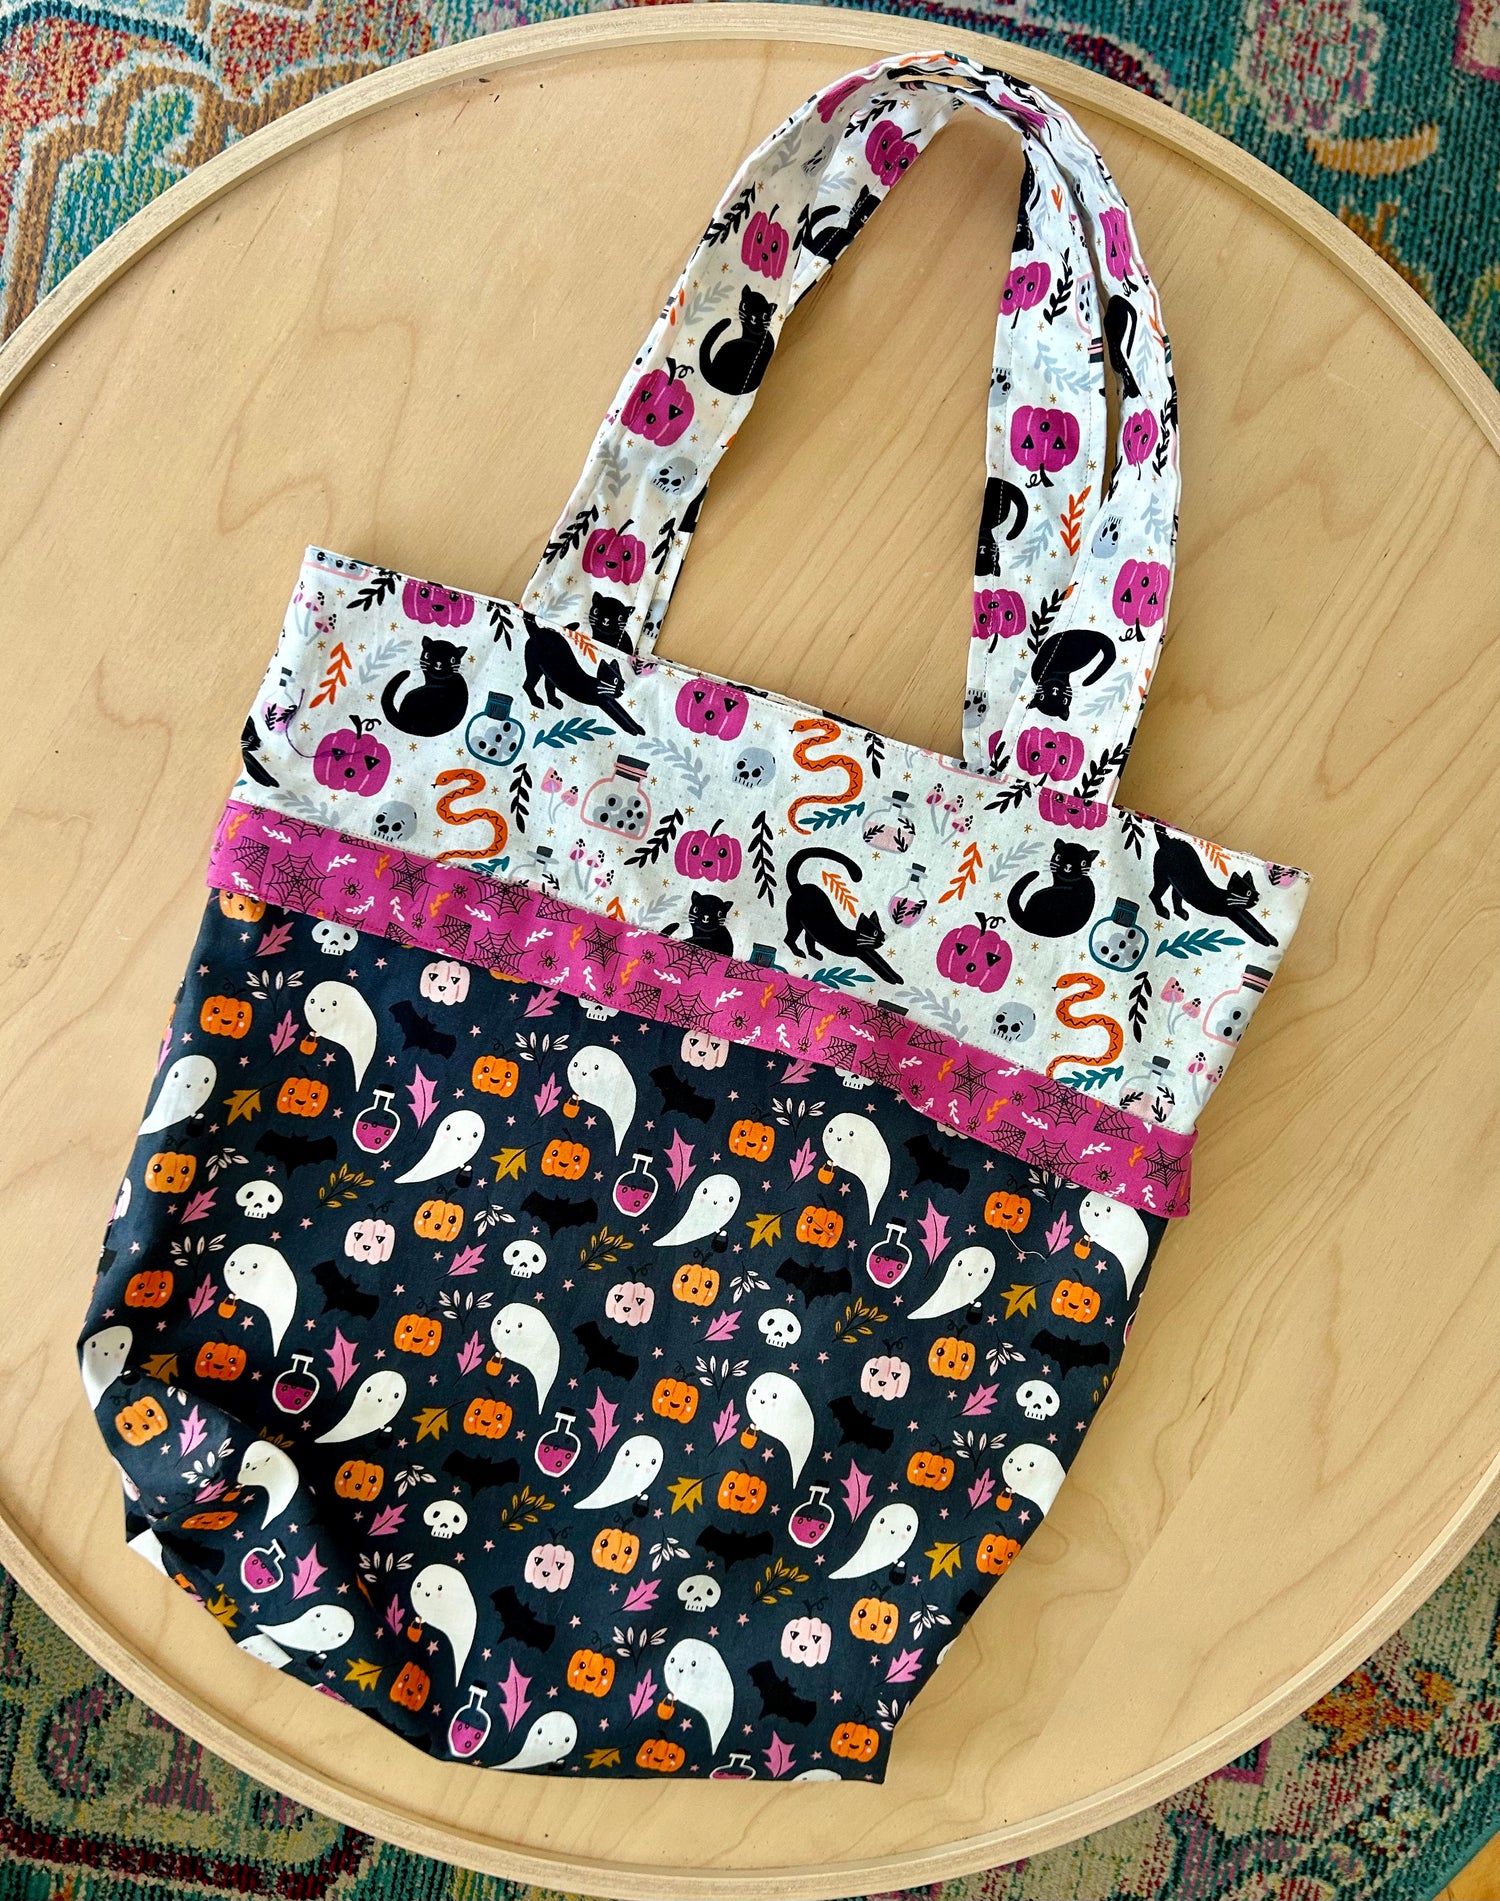
Check out this free Hallowe'en treat bag pattern from Fat Quarter Shop! Not only is it cute, it's so easy that it's a great first tote for bag beginners like myself.
I decided to give it a try with three prints from By the Glow of the Moon from Cotton+Steel.

If you've never used Cotton+Steel fabric, it's so super soft and strong. It would be lovely as a pillowcase that could double as an extra big treat bag.
To make this bag, gather the following fabric and head on over to the Fat Quarter Shop to download their free pattern!
- ½ m Ghostly Greetings to You for body
- ¼ m Toil and Trouble for flange
- 1 m Under a Spell for the handles, top and lining
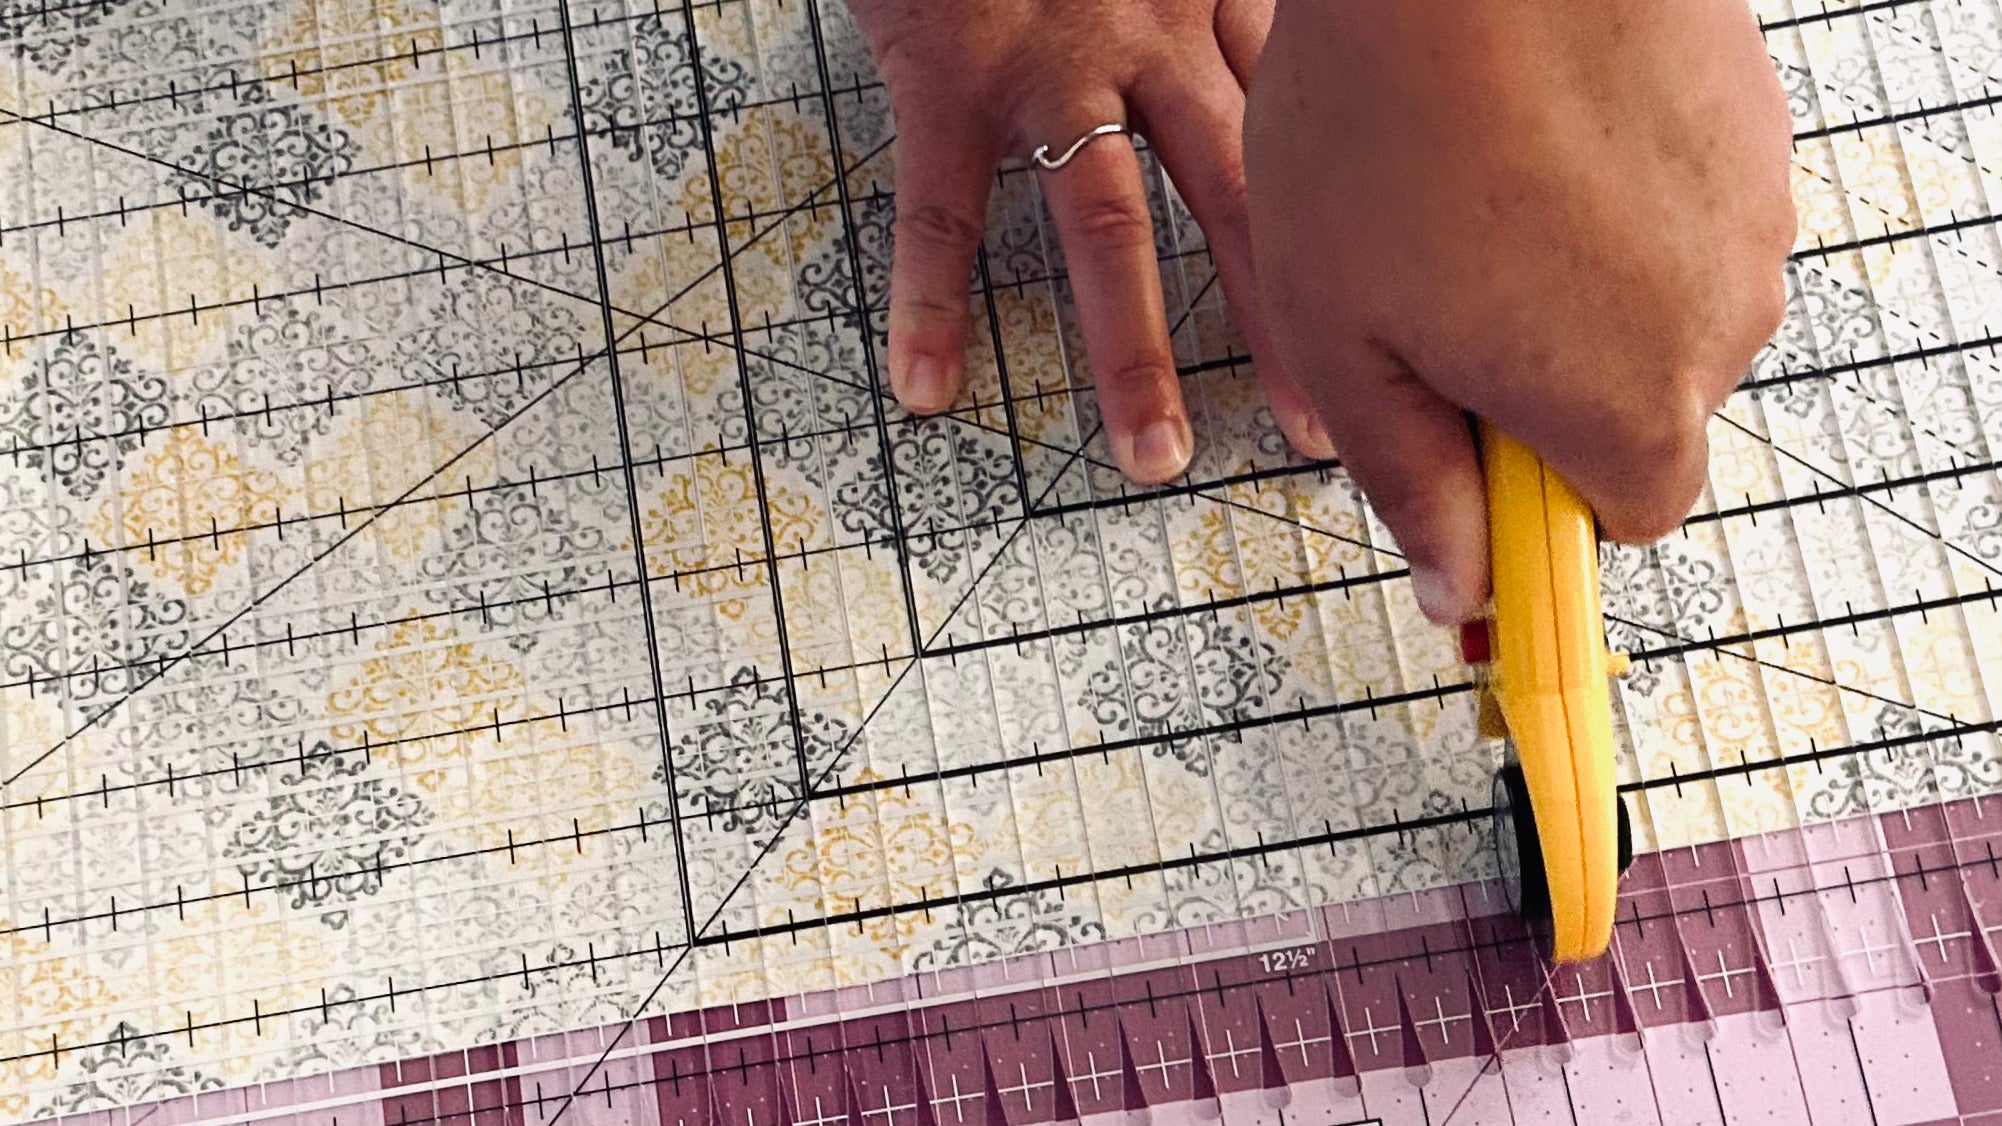
I won't go step by step through the pattern as they do a great job on the handout itself, but here are a few pictures to give you a sense of the process.
Make the handles by folding each 7" x 21" handle piece in on itself twice and stitching down both sides. I took care to cut the fabric straight along the pattern lines to make the cats show to advantage.

Fold a flange strip lengthwise, right sides together, and ironed. Lay it along the top of one body piece, then lay the top piece right side down. Line all the raw edges up and sew all three pieces together. Repeat to make two body units.
Hint: if the body fabric and flange fabric have directional patterns, these should be pointing up toward the raw edge when sewing. The top fabric pattern should be pointing down, away from the raw edge.

Place the body units right sides together and sew together along the sides and bottom. Leave the top edge open. Repeat with the two lining pieces.

With bag lining inside out, fold each bottom corner so the seams are together. draw a line 2" in from this corner, then sew along the line. Cut the outside corners off leaving a generous seam allowance. I backstitched on both ends of each of these new seams to add strength to the bottom of the bag. Repeat for the bag body.


Turn the bag body right side out. Pin each end of a handle about 3.5" in from each side of the top of the bag body, right sides together and raw edges together. Don't pin through both sides of the bag. Hint: you can also pin the handle to the bag about 2" down from the top. This will ensure the handle doesn't pivot a bit when sewing it to the bag.
Stitch the handle in place. Make sure you don't sew through both sides of the bag! Repeat on the other side of the bag with the other handle.

Turn the lining wrong side out and slide it up over the bag unit. The handles should hang down between the lining and body on each side. This means that when you turn the bag right side out, the handles correctly come out of the seam at the top of the bag.
Match up raw edges at the top, then sew all around the raw edges, except leave a 3" opening between the one of the handles. Turn the bag right side out through this opening, then stitch around the top of the bag to close it up.
Enjoy your adorable treat bag or simple shopping bag. Happy Hallowe'en!

Please keep your beautiful projects coming as we love to see them! Bring them in to the store or tag us on instagram! @sewwithvision @sundewquilts_ns
Sarah
![]()
Leave a comment
This site is protected by hCaptcha and the hCaptcha Privacy Policy and Terms of Service apply.