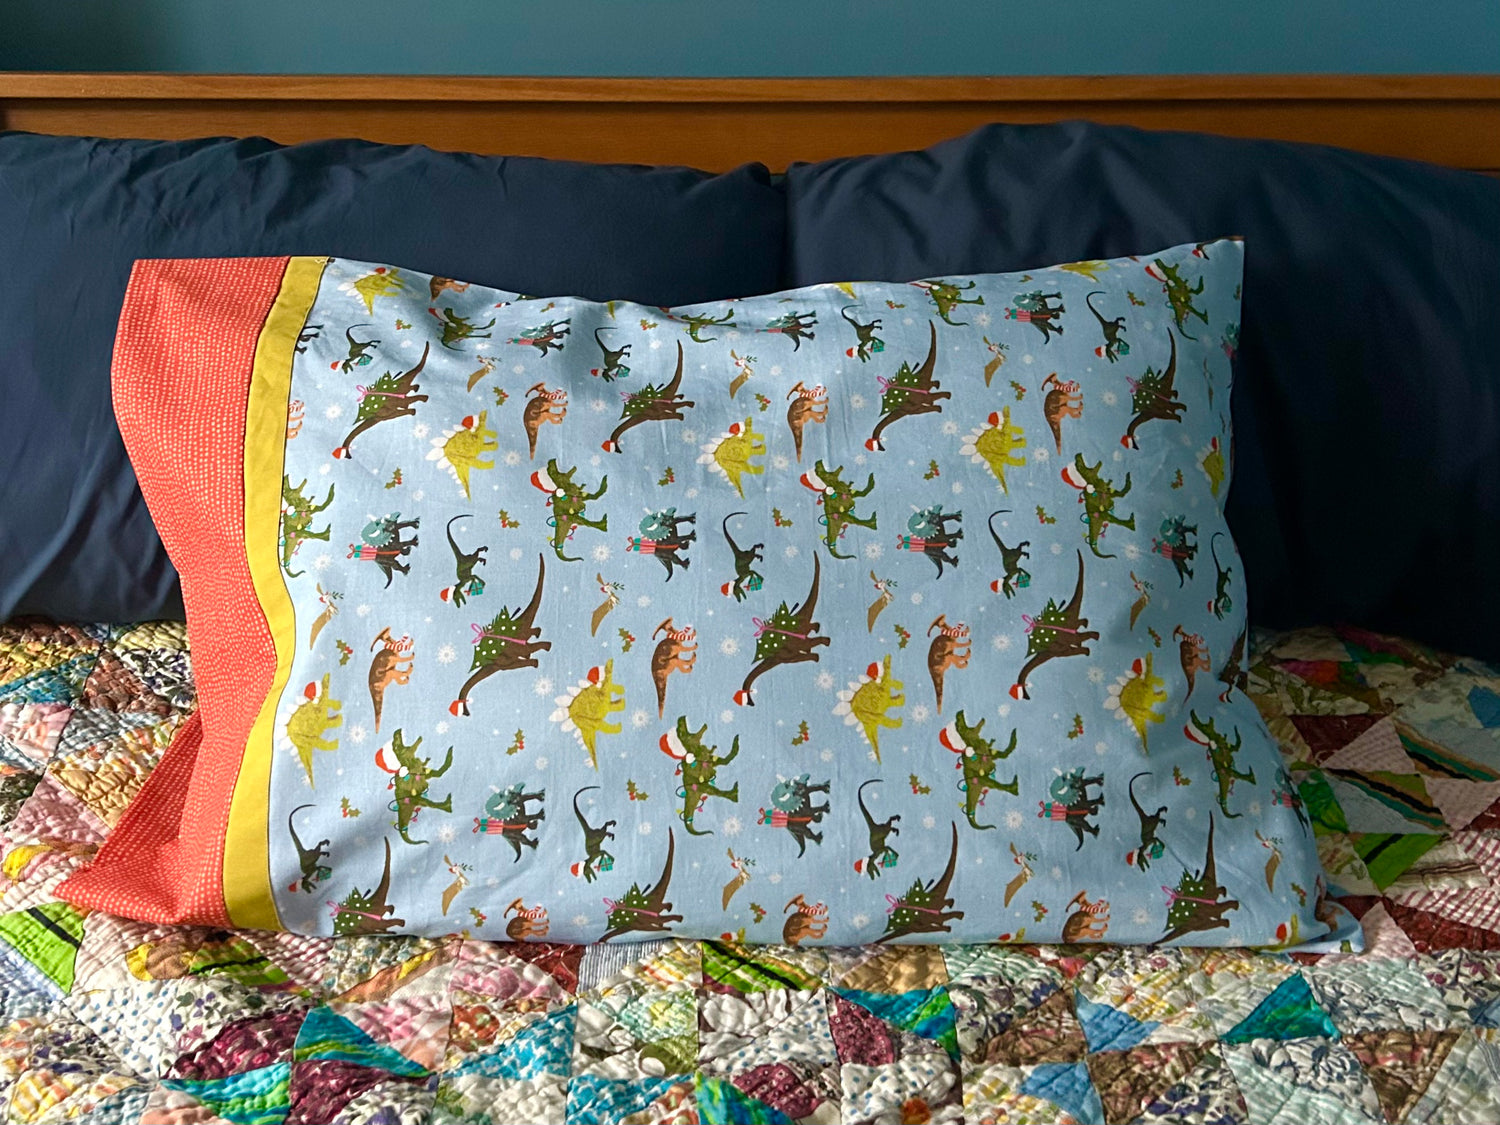
A special pillowcase featuring a fun print is a great, personal gift for kids. It's a low-commitment way to include interests or characters that may be fleeting. Pillowcases are also a great use for fun holiday prints, like a Hallowe'en pillow case that doubles as a treat bag or a Christmas pillowcase that doubles as gift wrapping.
Gifting a bed quilt? Add on a set of matching pillowcases using leftover fabric. White/neutral sheeting for the body of the pillowcase and quilting cotton for the flange and cuff looks fantastic. There are measurements below for standard and king-size pillowcases.
This tutorial features the burrito method, which is a classic way to make a simple French seam pillowcase.
Fabric requirements and cutting directions
For a generous standard size pillowcase:
- Fabric A (body): 27” x width of fabric (¾ yard)
- Fabric B (flange/accent): 2½“ x width of fabric
- Fabric C (cuff): 9” x width of fabric (¼ yard, or ½ yard to be safe)
For a king size pillowcase:
- Fabric A (body): 36” x width of fabric (1 yard, or 1¼ yds to be safe)
- Fabric B (flange/accent): 2½“ x width of fabric
- Fabric C (cuff): 9” x width of fabric (¼ yard, or ½ yard to be safe)
Fabric selection
Choose quilting cottons that are nicely smooth and soft for the body fabric. You may even want to wash the finished pillowcase a few times before using, to soften it up. See the end of this tutorial for a discussion on directional print fabrics.
I used this super cute Santa-saurus fabric with a solid and blender from my stash.

Prepare the burrito
Fold Fabric B (flange) in half lengthwise, wrong sides together, and iron to create a 1¼” x WOF strip.
Using a large work surface, lay Fabric C (cuff) right side up, with selvedges to left and right.
Lay out the flange (fabric B) with cut edges aligned to the bottom of the cuff (fabric C). Pin or clip together these layers at the bottom edge for convenience.

Lay out the body (fabric A) right side up below the cuff and flange to check layout. The selvedge edges at right and left will eventually be sewn together to form the bottom of the pillowcase. The cut edge at the bottom will be the far edge of the pillow case. The cut edge at top will be sewn to the cuff and flange.

Once layout works for you, flip the body (fabric A) up over the flange and cuff so the body is right side down and the edge that was closest to the cuff is aligned with the edge of the flange and cuff layers.

Pin or clip the layers of fabric together along the bottom edge, trying to keep all edges lined up precisely together.
Roll the body fabric from the far end toward the cuff. Try to make the roll small. Finish the roll an inch or two from the pinned edge.

Finally, take the free edge of Fabric C (cuff) at top that was exposed when rolling up the body fabric.
Bring this edge over the fabric roll and align it with the rest of the cut edges to form a tube, or burrito. The wrong side of fabric C will be facing out.
Re-pin the cut edges, adding the final layer of Fabric C. Try to align the cut edges as much as possible while pinning so they’re all captured when you sew them together.
The pinned layers will now be, from bottom: Fabric C, Fabric B, Fabric B, Fabric A (one layer), Fabric C. The photo below shows the layers of fabric.

Sew the layers together with a generous ¼“ seam. Back stitch a few stitches at both edges to reinforce.

Turn the tube (burrito) right side out.

You will now see a cuff, the flange, and the body fabric. Press the cuff fabric (C) flat and away from the body fabric. Press the flange fabric B toward the body fabric.
Optional: At this point I sew the folded edge of the flange down, topstitching with matching thread. This is because no pillowcase I create will ever see an iron once complete, and this step keeps the flange nice and flat instead of wrinkling up in the dryer. I use a zipper foot to stitch the flange to the body fabric right along the edge. If your iron ever gets used outside of the sewing room you can skip this step.

Sew the exterior seam
Fold the unit wrong sides together with selvedges meeting. Square up the sides while cutting off the selvedges. Pin together, still wrong sides together, along the side. Ensure the edges of the flange are matched up as you pin.
Square off the bottom of the pillowcase (the remaining cut edges of Fabric A) and pin (still wrong sides together).
Sew a ¼” seam along the pinned side and bottom of pillowcase. Once again, backstitch at the beginning and end to reinforce the seam.

Trim the seam allowance down to ⅛”. In the photo below, the bottom seam has been trimmed and the side seam has yet to be trimmed.

Sew the French seam
Turn the pillowcase inside out. Push the seam edges out completely – I often roll out the fabric a bit toward the seam to ensure that it is completely pushed out before pressing. This will prevent bits of the raw edges from being exposed on the right side of the pillowcase after the final seam.
Press the seams. Note in the photo below how the seam has been pushed completely out.

While the pillowcase is still inside out, sew a generous ¼” or ⅜” seam on the side and bottom seams, trapping the raw edges of the previous seam inside this new French seam. You may need to go slowly over the thick layers of fabric where the flange and cuff meet.

Turn the pillow right side out and press. Trim any stray threads poking out of the French seam. Wash before using and enjoy!

A note on directional print fabrics
The ideal directional print for this project will have the print running perpendicular to the selvedge, although I find it much more common to see prints running parallel to the selvedge as with the Santa-saurus print I used here. Kids don’t seem to mind either way :)
Choose whether you want the cuff of the pillow facing left or right (or if making two matching pillowcases, choose one of each).
The top part of the diagram below shows an exploded view of the finished pillow.
Lay out your fabrics according to the bottom part of the diagram, with selvedges at left and right.
The bottom part of the diagram shows Fabrics A (body) and B (flange) right side up. Before sewing they will be flipped upside down and lain across Fabric C (cuff).
The darker colors indicate the part of the pillow that will face to the front (which depends on whether the cuff will be to the right or left).

Thanks for sewing along with us. As always, we absolutely love seeing your work! Bring it in to the store or tag us on instagram! @sewwithvision @sundewquilts_ns
Sarah
![]()
Leave a comment
This site is protected by hCaptcha and the hCaptcha Privacy Policy and Terms of Service apply.