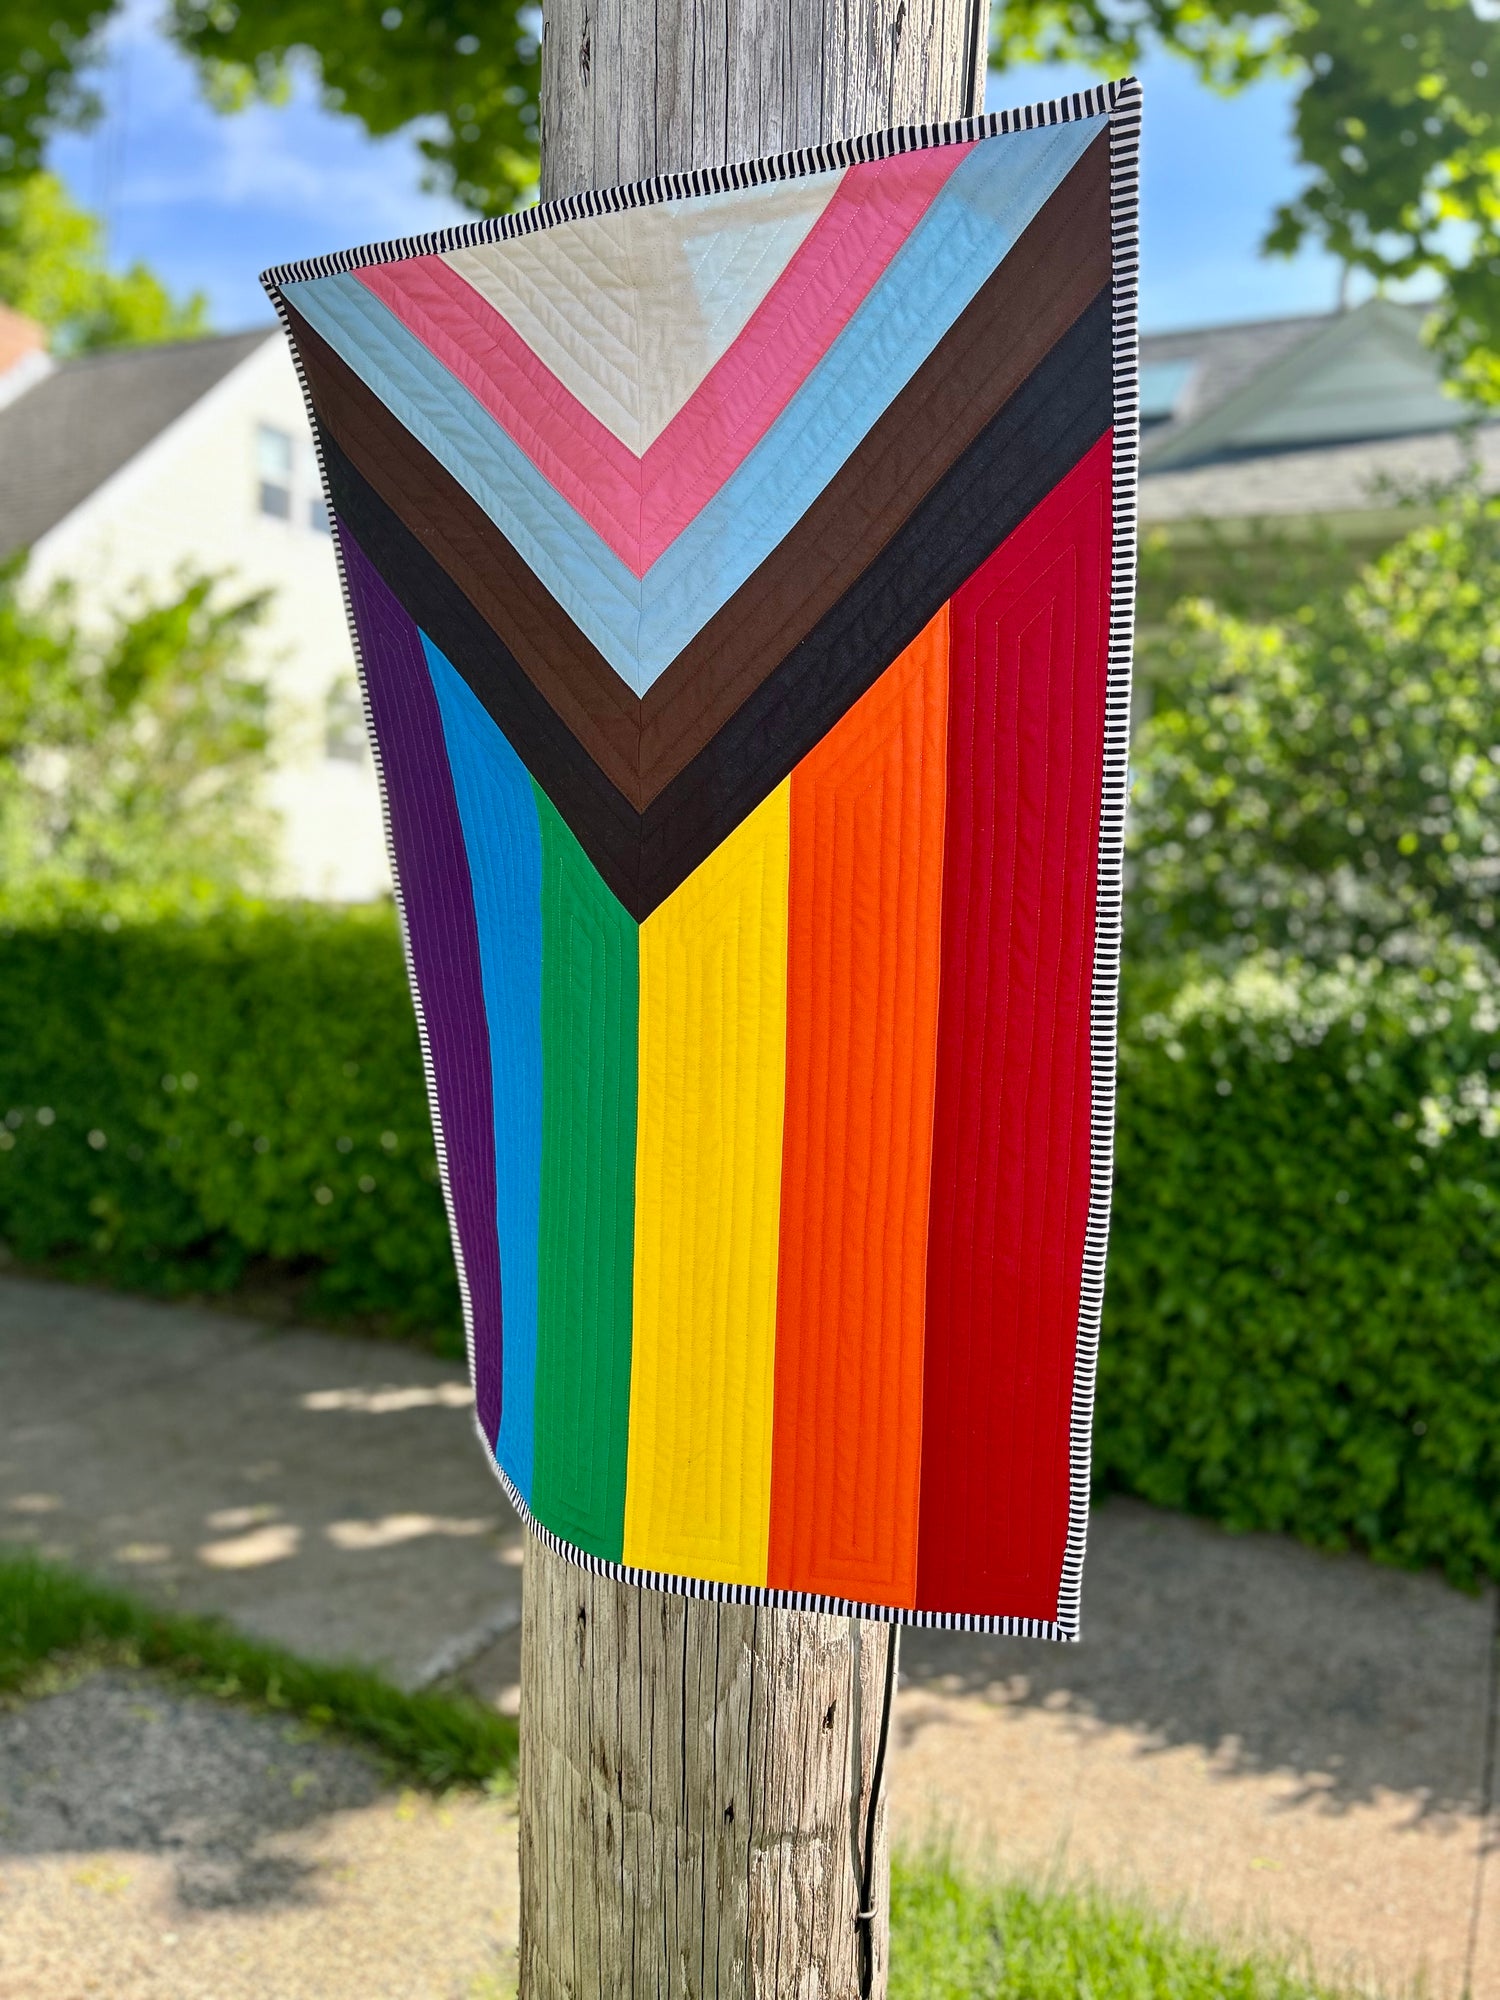
Welcome back to the blog! This pride month we wanted to do something extra special so we created a free progress pride wall hanging pattern.
The Progress Pride flag design was created by Daniel Quasar. Here is Quasar's inspiration for the flag in the artist's own words:
The trans flag stripes and marginalized community stripes were shifted to the Hoist of the flag and given a new chevron shape. The arrow points to the right to show forward movement, while being along the hoist edge shows that progress still needs to be made.
The Trans Pride flag was originally created by Monica Helms in 1999.
The use of black and brown was original conceptualized and created into the More Color, More Pride flag in Philly, introduced by Amber Hikes in 2017.
The use of a black stripe to represent those lost during the AIDS crisis, referred to as the Victory Over AIDS flag was suggested by Sergeant Leonard Matlovich. It is elevated here to bring awareness to the stigma surrounding those living with HIV. Red also represents AIDS Awareness and the constant search for a cure.
Progress Pride Wall Hanging
CLICK HERE for a printable pdf version of this pattern.
Finished size: 24" x 36"
Fabric and cutting requirements
A fat quarter of white and long quarter of each of the other colours will make two wall hangings.

- Red: 4½" x 31" (Bella Country Red)
- Orange: 4½" x 28" (Bella Tangerine)
- Yellow: 4½" x 24" (Bella Sunflower)
- Green: 4½" x 24" (Bella Emerald)
- Blue: 4½" x 28" (Bella Azul)
- Purple: 4½" x 31" (Northcott Pansy)

- Black: (2) 2½" x 22" (Bella Raven)
- Brown: (2) 2½" x 20" (Bella Moda U Brown or Northcott Coffee Bean)
- Light blue: (2) 2½" x 18" (Northcott Cloud Nine)
- Pink: (2) 2½" x 16" (Northcott Coral)
- White: 8" x 8" square: cut square diagonally to make (2) 8" x 8" triangles. (Bella White Bleached)
- Batting: 26" x 38"
- Backing: 28" x 40" (1 yard)
- Binding: 10" x 40" - (4) 2½" strips
Create the stripe units

Top stripe unit: Arrange the red, orange and yellow strips, right side up, with red at top. Align the strips along the right side. Sew the strips together with a ¼" seam, keeping the strips aligned on the right side. Press seams open or to the side.
Bottom stripe unit: repeat with the green, blue and purple strips, with green at top.
Each unit should measure 31" x 12½". Square up the right edges.
Cut a 45° angle line from the top left corner of the red strip down to the bottom of the yellow strip. You can use the 45° line on your ruler or cutting mat by aligning that line with the top of your stripe unit and cutting along the ruler edge.


Repeat for the bottom stripe unit, cutting at a 45° angle from the bottom left-hand corner of the purple strip to the top of the green strip.
Set the two stripe units aside.
- Measure the length of the red strip.
- Subtract the height of the stripe unit from this length to get X (length of red strip - height of unit = X).
- Take the number X and mark that far in from the bottom right of the yellow strip. E.g. if length - height is 18½", mark 18½" in from bottom right.
- Draw a line and cut from this mark to the top left-hand corner of the red stripe. This will give you a 45° angle.
- Repeat for the bottom stripe unit, measuring the length of the purple stripe and marking in from the top right side of the green stripe.
- Set the two stripe units aside.

Create the chevron units

Top chevron: Arrange (1) of each colour of 2½" strips per diagram at right. Black at top, followed by brown, blue, and pink. Ensure each strip is offset on the right by 2". Sew strips together with ¼" seam and press open.
Sew the long edge of a white 8" triangle to the pink strip.
Offset the tip of the triangle 2" from the right side of the pink strip. The seam will be slightly more than 2" from the end of the pink strip.
Ensuring the black strip stays at a 45° angle to the right side, square off the right side of the unit flush with the white triangle. Don’t trim the left side yet.
Trimming the unit flush with the right side of the white triangle should give a 45° angle if the triangle didn’t distort during sewing and pressing.


Bottom chevron: Start again with a black strip on top, then brown, blue and pink. This time offset each strip 2" on the left. Sew the long side of the second white triangle to the pink strip, with the point of the triangle 2" from left end of pink strip.
Ensuring the black strip stays at a 45° angle to the left side, square off the left side of the unit flush with the white triangle. Don’t trim the right side yet.

Assemble the wall hanging

Align the black strip of the top chevron unit, right sides together, with the top stripe unit.

The point of the black strip should overhang the bottom of the yellow strip by about ¼". The fabrics should intersect where the seam starts, ¼" from the edge.

Pin the units together and sew. Press seam open or to the black. Trim the chevron unit flush with the bottom of the yellow strip after pressing, if needed.

Repeat with the bottom chevron and stripe units. The tip of the black strip willoverhang the top of the green by about ¼".
Sew the top half to the bottom. Pin where the chevron strips intersect to ensure matching points.

To square up the hanging, first trim the top and bottom flush with the stripe units. On the left-hand side, cut so the seam between the blue and brown stripes intersects the corner.

Sandwich and quilt to your taste. Bind using your preferred method.
You may wish to include a hanging pocket or tabs on the top or left side of the hanging. I incorporated triangular hanging pockets on two corners and a hanging loop in the middle, sewn in as I sewed the binding on.

Please show us your beautiful work! #progresspridewallhanging @sewwithvision @sundewquilts_ns
The Progress Pride flag design and this pattern are copyrighted under the Creative Commons BY-NC-SA license.
Thanks and happy Pride! - Sarah
![]()


Leave a comment
This site is protected by hCaptcha and the hCaptcha Privacy Policy and Terms of Service apply.