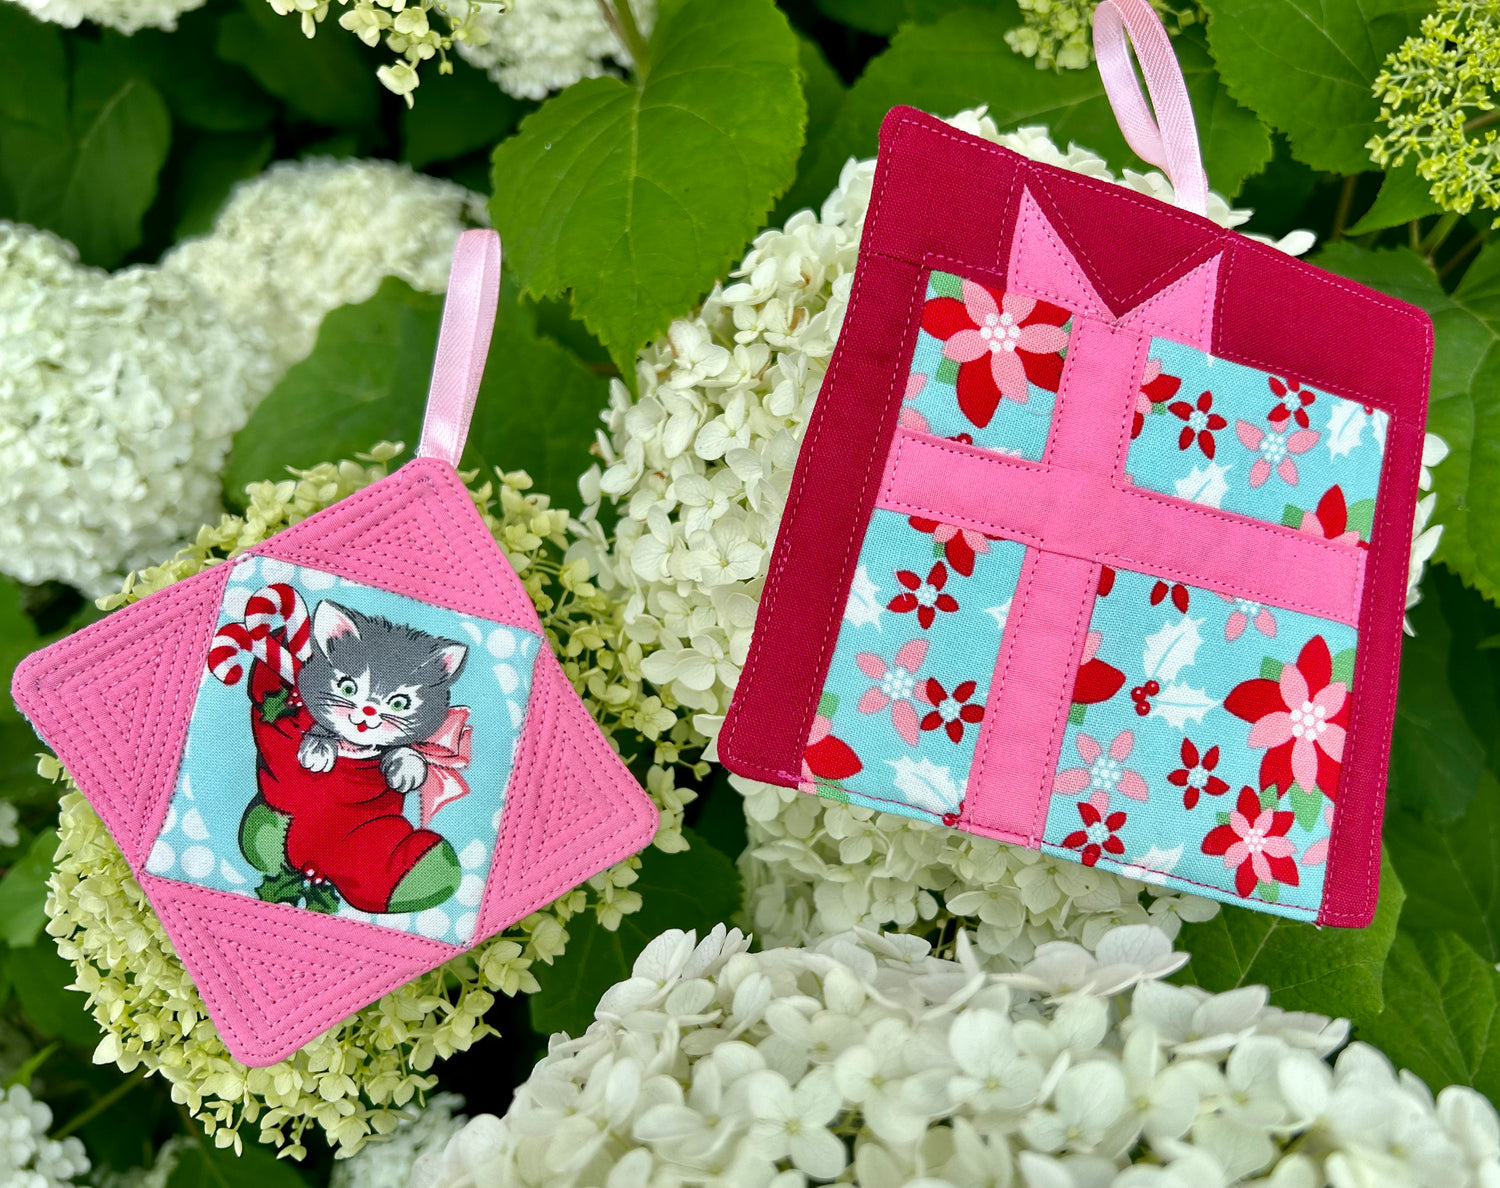
Any small or mini-block can become a christmas ornament! They are a great way to use up smaller scraps, or to feature small fussy cuts like the kitty stocking from the Kitty Christmas line. A lot of quilters enjoy the challenge of tiny piecing and these are a fun way to build skills.
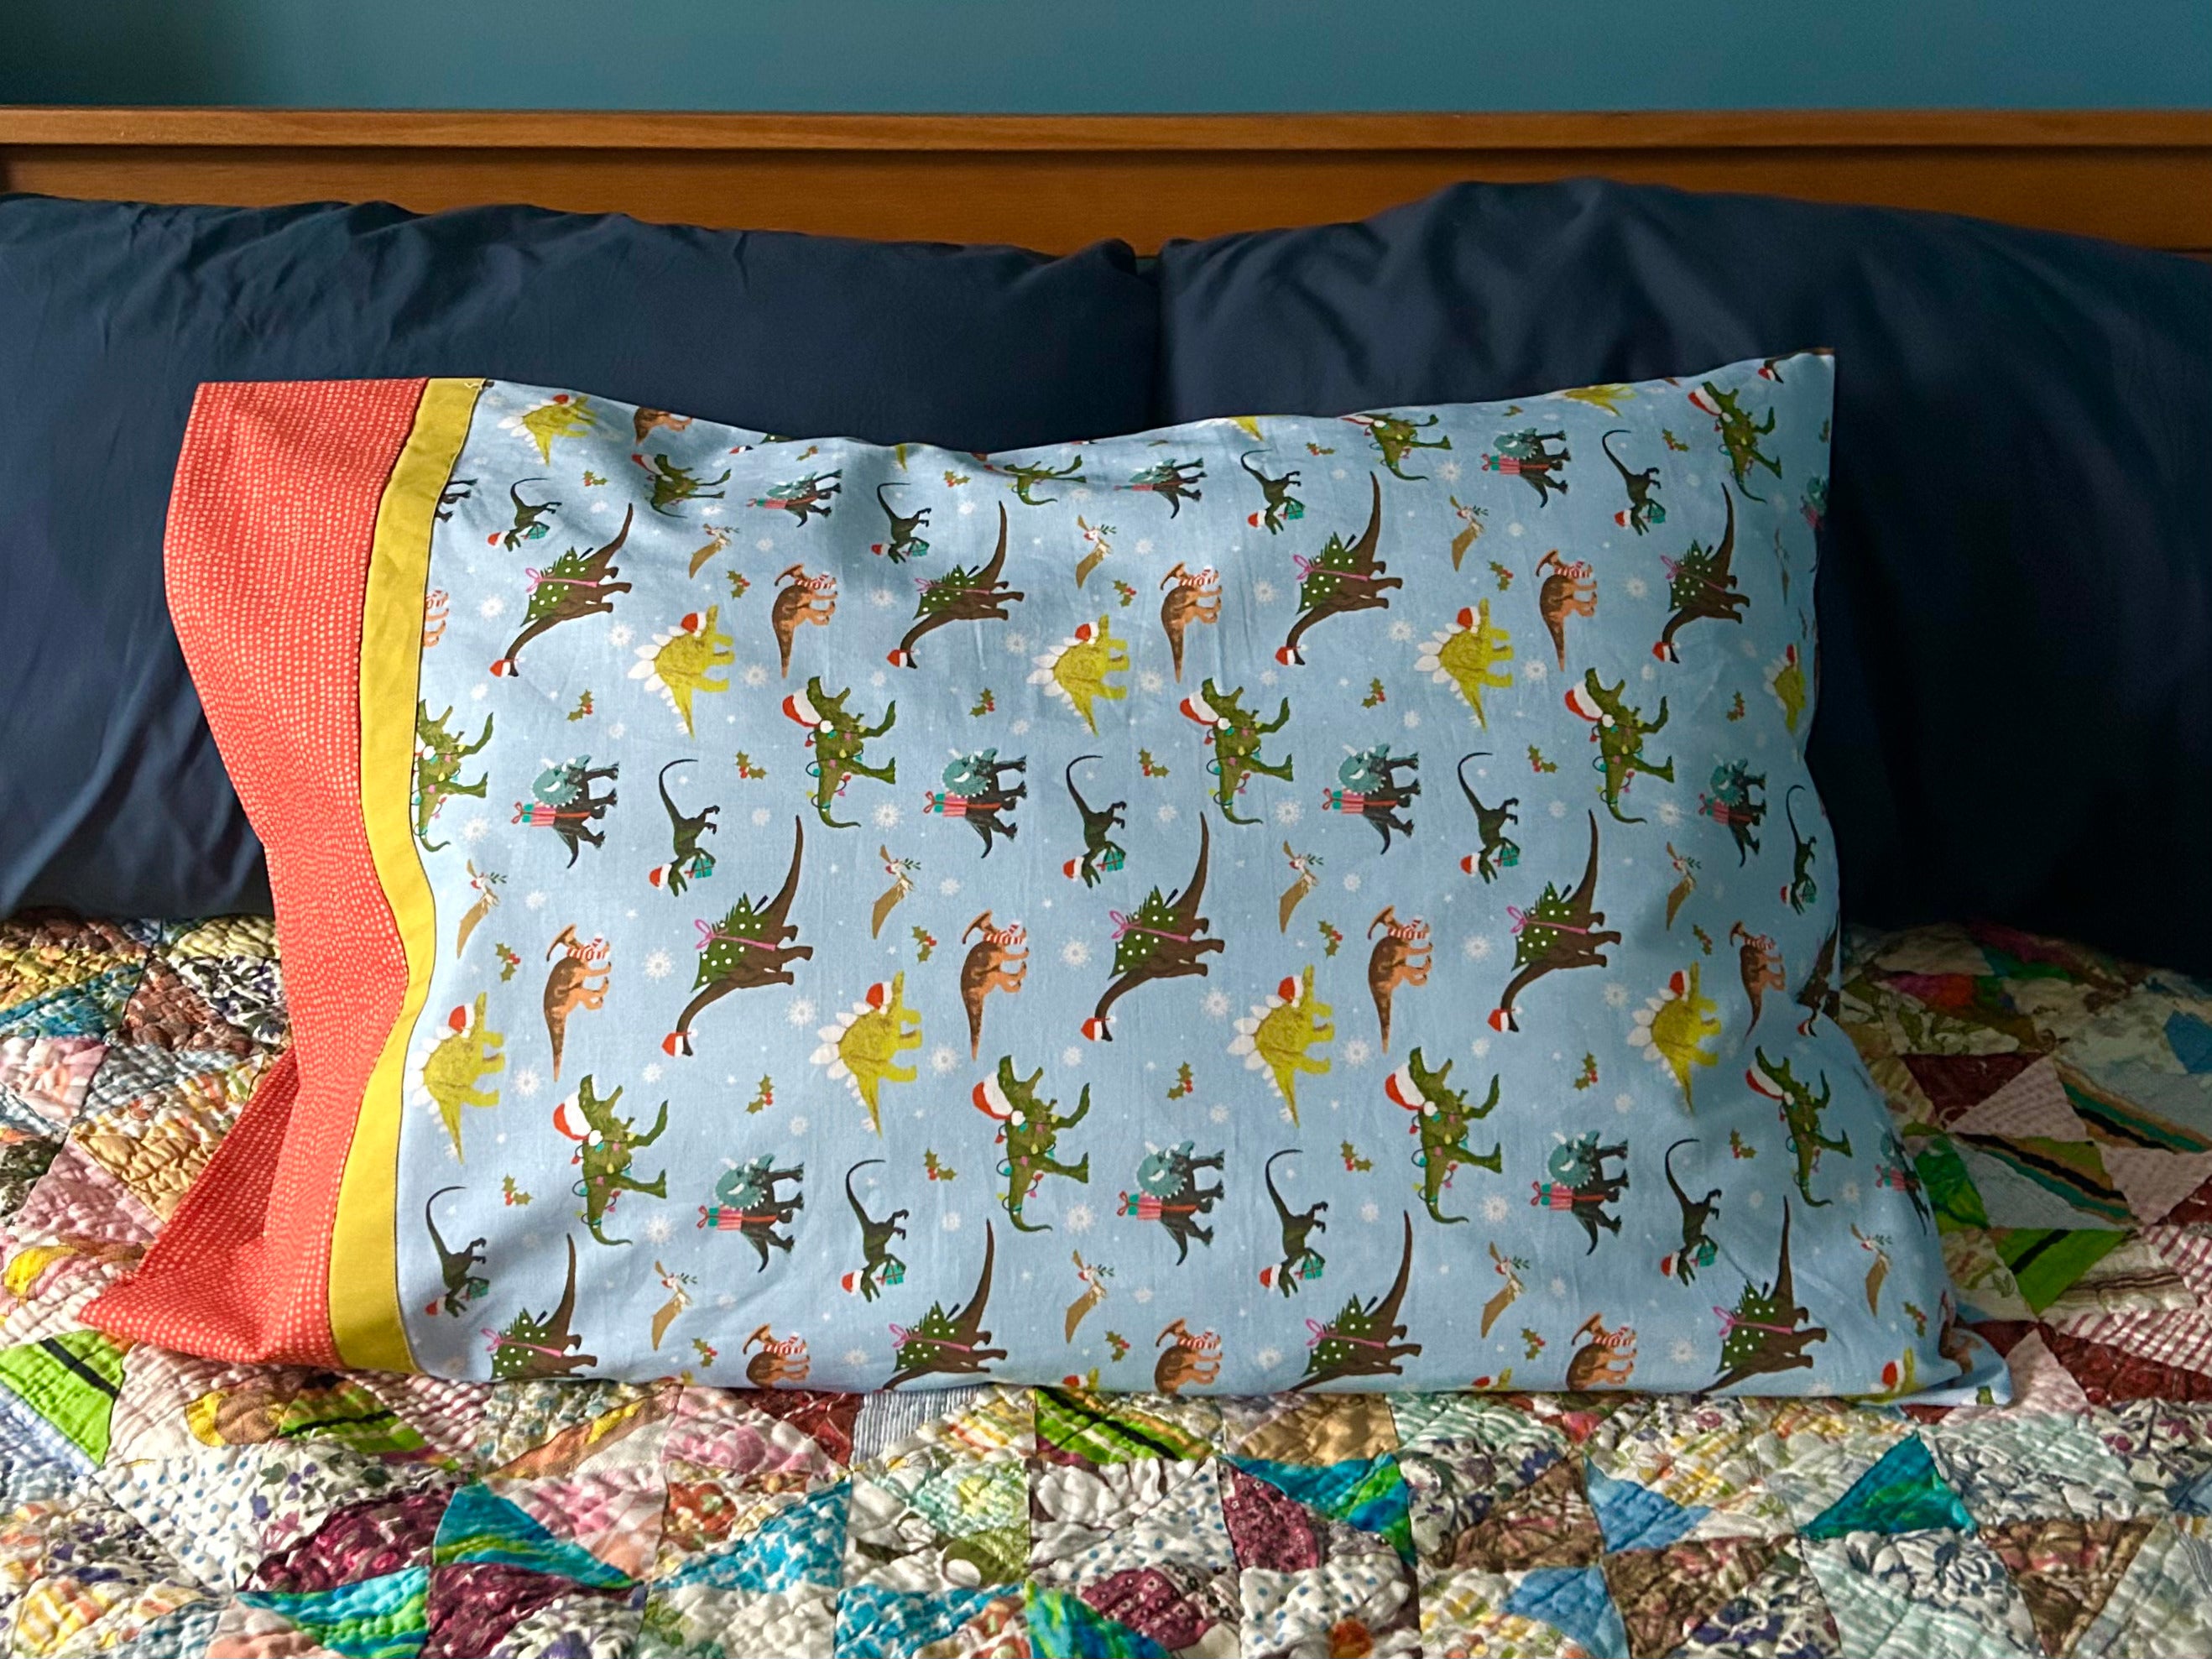
These ornaments are traditionally pieced and use a pillowcase finish instead of binding. I created the gift ornament featured in the tutorial below and just love it. Or, if you're using another block, skip down to the Assembly section.
Some tips:
- The sweet spot for a finished ornament in this style is between 2½" and 5" square. Any bigger and your ornament starts looking an awful lot like a potholder.
- Points are easy to lose when using a pillowcase finish, so I recommend a fairly scant seam or thin border around blocks with stars, flying geese, etc.
- I use a starch alternative (Best Press) and press most seams open so the finish is nice and crisp even with small pieces.
- Small block patterns are abundant on the internet: try the Blockheads 4 archive for 4 ½" blocks or Sewcialites for 3" blocks. Most classic quilt blocks have mini versions floating around the internet.

Gift Ornament
Fabric and cutting requirements
This ornament finishes at 4½" square. Each fabric requires a small scrap of about 5" square.

- Fabric A: (present)
- (1) 4” x 1½” rectangle
- (1) 4” x 2½” rectangle
- Fabric B: (ribbon)
- (2) 4” x 1” strips
- (2) 1¼” squares
- Fabric C: (background)
- (2) 4” x 1” strips
- (1) 1½” square
- (1) 1½” x 2” rectangle
- (1) 1½” x 2½” rectangle
- Batting: (1) 6” square
- Backing (1) 6” square
- Hanging loop: (1) 5” string or ribbon
Construct the body of the present
Sew a 4” x 1” strip of Fabric B to the right side of the 4” x 1½” rectangle of fabric A, using a ¼” seam. Press.
Sew the 4” x 2½” rectangle of Fabric A to the right side of this unit. Press.

Cut across the unit 1½” from the top, so the top part of the unit measures 1½” tall and the bottom measures 2½” tall.

Sew the second 4” x 1” strip of fabric B between these two parts and press.

Attach a 4” x 1” strip of background fabric to each side and press.

Construct the bow
The bow is made using stitch and flip corners.
- Align the 1½” x 2” rectangle of background Fabric C so the longer edge is horizontal.
- Draw a diagonal line corner to corner on the wrong side of each 1¼” square of ribbon Fabric B.
- Layer one of the squares on the bottom left side of the background rectangle, with line slanting down to the right.
- Note there will be some extra fabric at the top of the background piece compared to a flying geese unit.

Sew along the line. Trim ¼” away from the line toward the outside corner and press the corner open.

Now layer the second 1¼” square on the bottom right side of the rectangle, line slanting down to the left. Again sew along the line, trim, and flip open.

Sew the 1½” square of background fabric C to the left side of thie bow and the 2 ½” x 1 ½ “ rectangle of fabric C to the right side.

Sew this unit to the top of the present body, trying to align the bow with the centre of the ribbon. To keep the bottom point on the bow, try sewing just a shade to the outside of the point.

Square this block up to 5” square.
Assembly
Layer the block with batting and backing as follows:
- Bottom: Batting (fuzzy side up if applicable)
- Middle: Backing (right side up)
- Top: Block (right side down - please ignore the pressing mayhem).

Insert a hanging loop by pinning a 5” ribbon loop upside down to the middle of the top edge of the block. The loop should hang down between the right side of the block and the backing and the tails of the loop will stick out the top.

Stitch around this sandwich with a ¼” seam, leaving about a 2” opening to turn the block right side out.

Trim ¼” away from the seam allowance on all sides. Reinforce the corners with a few extra stitches, then clip the corners just outside the seam.

Turn the block right side out and push out the corners with a pointed chopstick or similar.
Iron the block flat, turning under the seam allowance at the opening.

Top stitch around the block close to the edge (at most ⅛”) to secure the opening and reinforce the hanging loop.
Quilt to your taste and enjoy! If you omit the hanging loop these can also act as coasters. Simple fussy cut coasters were a surprise hit at my last Christmas party.

Thanks for joining us this month. Show off your beautiful work! Bring it by the store, or tag us on Facebook or Instagram (@sewwithvision, @sundewquilts_ns).
- Sarah
![]()
Leave a comment
This site is protected by hCaptcha and the hCaptcha Privacy Policy and Terms of Service apply.